HI. Here it is my first exercise on photoshop. I use 5 basic photo corrections on my photo. .
firstly,
 |
| click file and open. |
 |
| And choose the file. |
 |
| Duplicate the layer so that I have the original if I make a mistake. The way I duplicate the layer is just drag the layer to the "create new layer" icon. It is the easier way to duplicate layer. |
 |
| click image menu, and hit image size |
 |
Next, change the size that I want. The size 640*480 and the resolutions is 72 per inch. its so small so I zoom in the image, so that it easy for me to edit the picture. Next, (1st) Spot healing brush tool and (2nd) patch tool  I select the "spot healing brush tool" to remove all different spot thing on my face.  ZOOM in (cntrl +) and start to click on the area that I desire to change.  Finish with the spot healing brush tool, now I select the "patch tool."  I use the patch tool for reduce my small wrinkle under my eyes, just select that particular area. and drag it to any area that I think suitable for it. 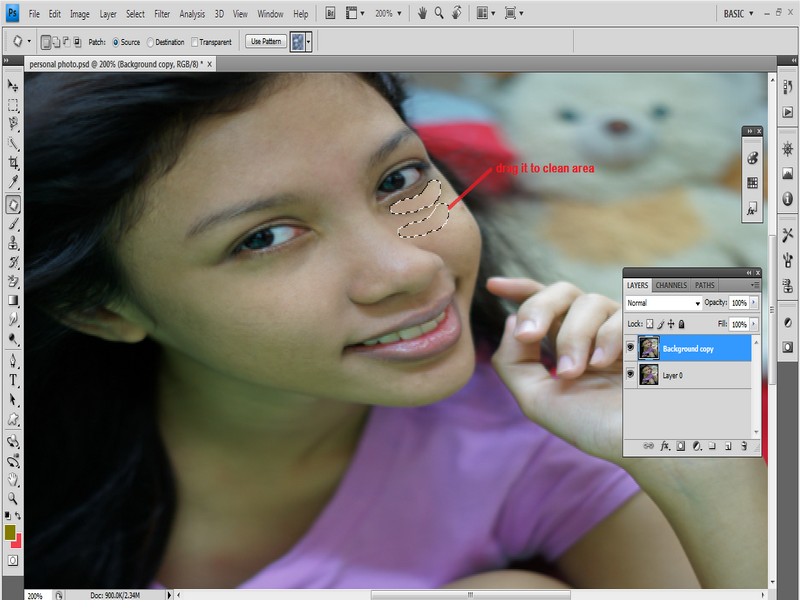 I do the same thing with my next eyes. 3. . Surface blur and layer mask.   hit the "filter" menu and go to "blur" and select "surface blur".  I go to the "layer" menu and and go to "layer mask" and hit 'hide all'. It will hide all the blur effect that i made it. Then, use the brush tool ( B ) and click on particular area on my face to smooth it. 4. . Change hair colour.    After my whole hair was colored,     5. . liQuify.     |
 c
c
0 comments:
Post a Comment